Step-by-Step Guide Deploying Stable Diffusion 3 on Your Local Laptop in 2024
Step-by-Step Guide Deploying Stable Diffusion 3 on Your Local Laptop in 2024 - System Requirements for Stable Diffusion 3 on Laptops in 2024

## System Requirements for Stable Diffusion 3 on Laptops in 2024
While Stable Diffusion 3 can be deployed on laptops, it's crucial to ensure your system meets the minimum requirements for a smooth and efficient experience. While older GPUs might suffice, newer models like NVIDIA's 30 and 40 series are highly recommended for optimal performance. This is especially important considering the increased complexity of the SD3 Medium model with its 2 billion parameters, which is designed for generating higher quality and more detailed images. Keep in mind that 8GB of VRAM is a strong starting point, but dedicated graphics cards with more memory will allow you to push the boundaries of your creative endeavors even further.
Beyond the hardware requirements, users need to consider allocating sufficient storage space. A minimum of 12GB on an SSD is generally recommended for swift operation and smooth loading times. The installation process, while straightforward, does involve specific steps to configure your local environment. Don't underestimate the importance of properly setting up your local environment for optimal performance, particularly if you are a newcomer to AI art generation. While the process of running Stable Diffusion 3 locally may seem daunting, the rewards are worth the effort. It's a powerful tool for exploring your creative potential and producing high-quality images right on your laptop.
Let's dive into the nitty-gritty of running Stable Diffusion 3 on a laptop, focusing on what makes it tick beyond just the basics. We're talking about the often-overlooked details that can mean the difference between a seamless experience and a frustrating slog.
Firstly, your GPU is the engine. It's not enough to have just any graphics card; it needs a minimum of 8GB VRAM. Anything less and you'll be choking the system. We're talking dedicated GPUs here; integrated graphics won't cut it.
Now, RAM is no less important. A minimum of 16GB is a good starting point. You can get away with less, but I wouldn't recommend it. Remember, the model needs a lot of breathing room to work effectively, so having more RAM helps to prevent bottlenecks.
You also need to pay attention to CUDA compatibility. CUDA is like a secret language between your GPU and the model, and it needs to be understood for things to work smoothly. An NVIDIA GPU with at least CUDA Compute Capability 6.1 is your best bet.
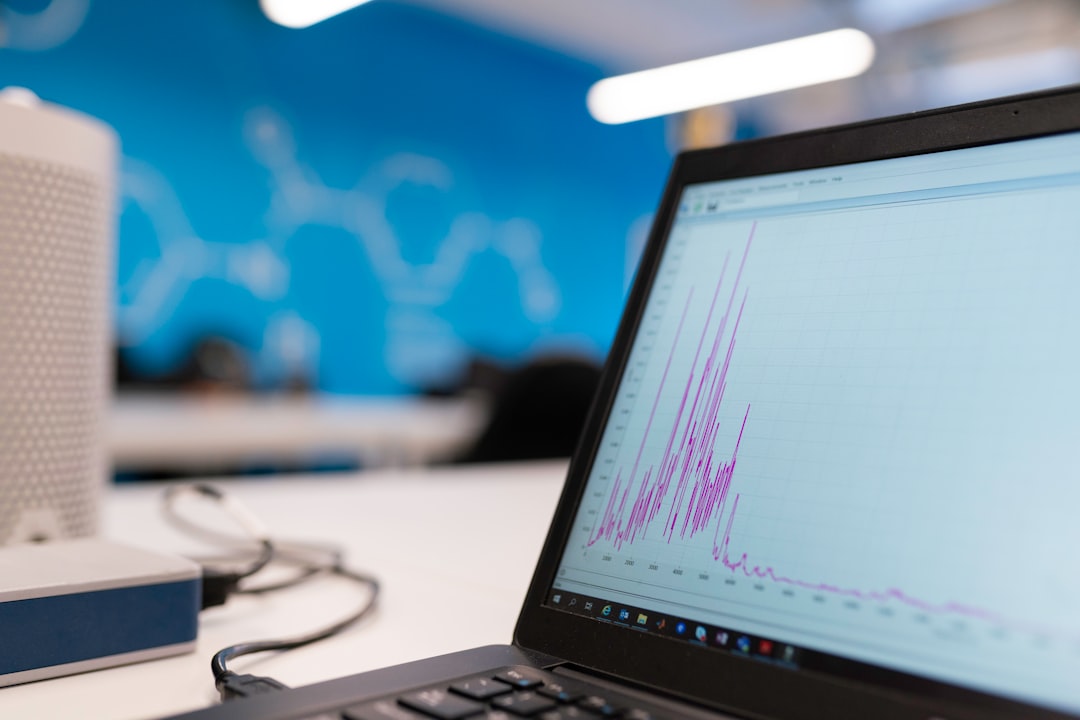
Next, disk space. You're going to need a good chunk of SSD space; aim for at least 20GB. Stable Diffusion 3 generates a lot of data, so you need room for those caches. And SSDs are crucial for fast loading times, as you'll be dealing with a 10GB+ model, which isn't a small file.
Let's talk about heat. High-performance GPUs generate heat, so make sure your laptop has decent cooling. Poor cooling leads to thermal throttling, which is basically the GPU slowing down to prevent overheating.
Remember your power supply, too. Stable Diffusion 3 needs a lot of juice, so ensure your laptop's power adapter is capable of handling it without draining the battery too quickly.
Windows is still the go-to operating system for running Stable Diffusion 3 smoothly. It's got the drivers and libraries needed for optimal GPU utilization.
Don't forget about Python. You need a robust environment with the right libraries, like PyTorch and TensorFlow. These are essential for running machine learning frameworks efficiently.
As you dive into Stable Diffusion 3, be prepared to adjust your setup. It uses some advanced neural architectures, so you might need to fiddle with things to get the best performance.
Lastly, make sure your virtual memory settings are generous. Remember that 10GB+ model? You need enough virtual memory to prevent your machine from crashing due to out-of-memory errors.
By paying attention to these finer details, you can ensure a much smoother experience running Stable Diffusion 3 on your laptop. Just remember, this is a computationally intense program, so don't expect your basic, everyday laptop to be a supercomputer. The better the hardware, the more impressive your results are likely to be.
Step-by-Step Guide Deploying Stable Diffusion 3 on Your Local Laptop in 2024 - Downloading and Installing Necessary Software Components
Before diving into the exciting world of creating images with Stable Diffusion 3 on your laptop, you'll need to get a few crucial components in place. Think of it as laying the groundwork for a powerful artistic tool.
First, you'll need to ensure you have some essential software already installed, such as Git and .NET. These tools are like the building blocks for your Stable Diffusion environment. Next, download the Stable Diffusion 3 model itself from Hugging Face – don't worry, it's free, but you'll need to sign up for a non-commercial license.
Before you start, make sure you have a dedicated folder for the Stable Diffusion model. A good rule of thumb is to have at least 10GB of free space on your drive. If you're using Windows, you'll also want to make sure you find the "models" folder within the "stablediffusionwebui" folder – that's where you'll be storing all those exciting models.
Once you have everything downloaded and organized, it's time to get your hands dirty. Activate your Anaconda environment, navigate to your Stable Diffusion folder, and run some specific scripts to get everything set up. It might sound complicated, but don't worry, detailed instructions are available for your chosen operating system (whether that's Windows, macOS, or Ubuntu). This final step essentially completes the installation and puts you on the verge of unleashing your creative potential with Stable Diffusion 3!
Okay, let's delve into the finer points of installing Stable Diffusion 3 on your laptop. While the guide might mention "easy installation," there's a world of nuanced details that can make the difference between a smooth experience and a frustrating one. Here are some things to be aware of, beyond the "just download it and run it" approach:
First, let's talk about libraries. You might see "install TensorFlow or PyTorch." These aren't just interchangeable bits of code. There are versions, like dialects, and some may not work together nicely. Mixing and matching without care can cause weird glitches and errors. It's a good idea to stick to the suggested versions for a smooth installation experience.
Next, those graphics drivers—don't underestimate their importance. They are like the communication bridge between your GPU and the software. Outdated drivers mean less efficiency and performance. Outdated drivers are like sending text messages to a rotary dial phone, you won't get what you want.
Speaking of communication, the computer's "environment variables" help software find its necessary bits. If you mess with those without knowing what you are doing, you could be telling the software to look for something in the wrong place. This can cause errors, so be mindful if you're making manual changes.
Now, SSDs are great for speed, but not perfect. If you overwrite the same spots on the disk repeatedly, the performance can degrade—imagine a worn-out road. It's not that common, but it's worth keeping in mind.
And Python, it can be tricky. It needs a lot of memory up front, which makes it more efficient. Just throwing it into the mix and letting it ask for memory later can slow things down. If you give it enough memory, it will be happy and work faster.
Oh, and imports. These are like bringing in tools from your toolbox. Importing a bunch of things when you only need a few tools can make your software start slower. It's like carrying your entire toolset around even if you are just going to use a screwdriver.
A virtual environment is a fantastic idea for Stable Diffusion 3, too. It's like having a separate toolbox for each project. That way, you can avoid messing with dependencies that might clash with other projects. It's like having separate toolboxes for carpentry and plumbing, keeping the tools organized.
Then, there's battery life. If you're running Stable Diffusion 3 on a laptop, you're likely using a lot of juice. Many operating systems have power management options; try to find that sweet spot between battery life and performance.
Even installing PyTorch is not as simple as it seems! Depending on the GPU you have, you need a specific version, or things might not be as fast. Just like having the right screwdriver for the screw.
And last but not least: Keep an eye on the system's resources. Use monitoring tools to understand how your CPU and GPU are doing. This can help you spot if something's not working efficiently, or if you are being bottlenecked by a specific component.
Stable Diffusion 3 is complex, so the installation can be a bit tricky if you are not careful. Pay attention to the nuances, and you will be rewarded with a smoother, more enjoyable experience! Just remember, it’s a power-hungry program, and your basic laptop might struggle. A better machine will get you much better results.
Step-by-Step Guide Deploying Stable Diffusion 3 on Your Local Laptop in 2024 - Setting Up the Conda Environment for Stable Diffusion 3

Setting up the Conda environment for Stable Diffusion 3 is a crucial step in getting this powerful AI image generation tool running on your laptop. It's about creating a dedicated space where all the necessary components will live and interact smoothly. Start by creating a separate folder for your Stable Diffusion files. This is like building a clean workspace, making sure you don't mix things up.
Next, you'll need to clone the Stable Diffusion web UI repository. Think of it as downloading a set of blueprints for building your AI image factory. Then, create a new Conda environment specifically for Stable Diffusion 3, naming it something like "sd3imagegenetator." This creates a self-contained space for all the software Stable Diffusion needs, preventing conflicts with other programs on your computer. Activate this environment, making it the active workspace for your Stable Diffusion project.
The final step in this process involves installing all the essential software components by creating a Conda environment from an environment.yaml file located within the Stable Diffusion repository. This is like gathering all the necessary tools for your workshop. It's a bit of a waiting game, as installing all the dependencies can take a while, but it's important to let the process run its course. Once everything is installed, you'll be ready to generate images using specific commands. You can even access the Stable Diffusion server via a web browser.
Don't forget to have Git installed beforehand; it's a vital tool for cloning repositories and simplifies the process of obtaining the necessary software. It's like having a helpful assistant who knows how to fetch the right tools for the job.
Setting up a Conda environment for Stable Diffusion 3 isn't just about running the software – it's about creating a controlled, efficient environment for experimentation and development.
First, the isolation provided by Conda allows you to run different versions of libraries for various projects without them interfering with each other. This is especially useful when testing different Stable Diffusion models with varying requirements.
Conda's package resolution system might seem like a minor detail, but it offers a more refined approach to managing dependencies compared to the common pip tool. This can lead to fewer conflicts, especially in the complex world of deep learning frameworks.
Furthermore, creating a tailored Conda environment specifically for Stable Diffusion allows you to install specific packages that minimize memory usage, maximizing performance on less powerful machines.
The beauty of Anaconda lies in its multi-platform support, making the Stable Diffusion 3 setup remarkably consistent across Windows, macOS, and Linux. This is a huge benefit for researchers and engineers who often work across different operating systems.
It's also possible to customize your Conda environment for specific tasks, like image generation or model training, which can significantly optimize the process.
Beyond performance, Conda allows for version control and reproducibility, enabling you to export environment specifications and recreate it on another machine. This is crucial for sharing your work or collaborating with others using Stable Diffusion.
However, the setup process is not without its pitfalls. Ensuring that you have compatible versions of CUDA and other libraries is crucial for optimal GPU utilization. If you're not careful, you might encounter "dependency hell," where incompatible library versions clash and cause installation issues.
Activating your Conda environment before running any Stable Diffusion scripts is crucial; failing to do so will lead to errors or slower performance due to relying on the default environment that might not have the required libraries.
Despite the potential challenges, the Anaconda community offers comprehensive documentation and support forums, making it a valuable resource for troubleshooting common issues.
Setting up a Conda environment for Stable Diffusion 3 is a worthwhile investment in time. It provides a robust and well-organized foundation for efficient development and experimentation, particularly in a field as computationally demanding as AI image generation.
Step-by-Step Guide Deploying Stable Diffusion 3 on Your Local Laptop in 2024 - Configuring the Local Server for Web Browser Access

Configuring a local server for web browser access is an essential part of running Stable Diffusion 3 on your laptop. While it might sound intimidating, it's actually quite straightforward.
You can usually activate a pre-installed Apache web server with a simple command like `sudo apachectl start` and access it through your browser by typing in "127.0.0.1" or "localhost". If you're on Windows, XAMPP simplifies the process, bundling all the necessary components like Apache, MySQL, and PHP. This makes creating a local web environment a breeze, even for those new to servers.
For a more advanced approach, IIS on Windows offers another option, although it requires setting up a new website in the IIS console and pointing it to the correct content directory.
If you want to allow remote devices to access your locally hosted website, you'll need to enable port forwarding. This allows devices outside of your home network to connect to your server. You'll also need to adjust the DNS settings on those remote devices to ensure they can find your local server using its IP address or hostname.
While it takes a bit of effort, configuring a local server can greatly enhance your experience using Stable Diffusion 3, making it more versatile and accessible.
Setting up a local server for web browser access is a crucial part of deploying Stable Diffusion 3. It's a step that often gets overlooked, but it's key to a smoother experience. Imagine if you could use a browser-based interface for your Stable Diffusion 3, just like you do with online tools. That's what we're aiming for.
Thankfully, the open-source community is incredibly helpful here, and many projects provide templates and guides for setting up local servers. They often include configurations for popular servers like Apache or Nginx, making the process much easier.
One challenge is port mapping. If you try to access your server through a web browser, you'll need to ensure the port you're using is not already being used by another application. You might need to change the default port from 5000 or 8000 to something else. This is important because Stable Diffusion 3 is a resource-intensive application, and you don't want it fighting for resources with other programs.
It's also essential to keep security in mind. You're essentially opening your computer to the web, so make sure your firewall is up-to-date and properly configured. It's a fine balance between convenience and safety.
One technique that makes a big difference is using WebSockets. These are like a continuous connection between your web browser and the server, allowing real-time communication for things like status updates or receiving images. It helps avoid delays and makes the process much smoother.
Another area to pay attention to is serving static files efficiently. These are things like HTML pages, images, or even large model files. If you don't optimize how they're served, the web browser will load slowly.
Environment variables play an important role, too. They tell the server where to find things like libraries or data. Set them up correctly and your server will run much faster, particularly with all the intricate code involved in running Stable Diffusion 3.
Lastly, use your browser's built-in tools to monitor how much CPU and memory your server is using. This helps identify any potential bottlenecks or performance issues, and can even give you clues as to why things might be running slowly.
While setting up a local web server can seem daunting at first, it’s a critical step. It gives you a much more user-friendly interface, mimicking online platforms while leveraging the power of local processing. It's a powerful way to interact with Stable Diffusion 3, making it accessible to a wider range of users and researchers.
Step-by-Step Guide Deploying Stable Diffusion 3 on Your Local Laptop in 2024 - Selecting and Loading Appropriate Models
## Selecting and Loading Appropriate Models
Choosing the right model for Stable Diffusion 3 is critical to getting the best results on your laptop. There are different versions of Stable Diffusion, and each has its strengths and weaknesses. You'll need to consider what you're trying to achieve to pick the right one. Stable Diffusion v1.5 is a popular option, offering a good balance of quality and speed.
Once you’ve decided on a model, download its checkpoint file and put it in a designated folder. This keeps your files organized and helps with quick loading times. Make sure you've allocated enough space on your drive because these files can be quite large!
It's important to pay attention to model compatibility with your hardware. Some models might be too demanding for your laptop, leading to sluggish performance or even crashes. Always check the system requirements before downloading anything, especially if you're new to Stable Diffusion. Don't be afraid to experiment with different models to see what works best for you.
If you want to fine-tune your results for specific creative tasks, you can try training a model with custom datasets. This allows you to teach the model to generate images in a particular style or with specific features. While training models can be a bit more advanced, it can be a rewarding way to customize your experience with Stable Diffusion 3.
Choosing the right Stable Diffusion 3 model is surprisingly critical, even though it seems like you just download one and go. You've got to consider things like model size, which affects how your system handles it. The SD3 Medium model is pretty beefy at 2 billion parameters, so even though it makes images look amazing, it's a real memory hog.
You need to be careful with your memory allocation. The model might use more RAM than you think, especially when it's working on making those images. Even a seemingly small change to model parameters can make a big difference in how well the images look and how fast your computer can handle them.
Make sure your GPU is a good match. Not every GPU is made for every model, so if you pick the wrong one, it could be slow or even crash.
It's interesting that some models can load just parts of themselves, which can speed things up. But that gets really technical and requires understanding how the model works.
Before settling on one model, it's worth trying a few to see how they behave. You might find some unexpected things that only become obvious when you compare them.
Pre-trained models are a quick start, but you lose some freedom to tweak things. It's a trade-off between getting going quickly and having more control over your results.
It's essential to keep track of the different models you use because they're constantly evolving. Even a minor update can change how they work, making it tricky to recreate results later.
Fine-tuning just part of a model can sometimes be better than retraining it entirely. It's kind of like changing a single setting instead of building a new machine from scratch.
There are tons of ways to measure how well a model works. Don't just rely on the overall "quality" rating. It might be great for one task but terrible for another.
So, in the end, it's not just about finding the right model. It's about understanding what makes each one unique and figuring out how to use them best. It's almost like you're becoming a model whisperer.
Step-by-Step Guide Deploying Stable Diffusion 3 on Your Local Laptop in 2024 - Creating Your First Image with Stable Diffusion 3

Creating your first image with Stable Diffusion 3 is like taking your first steps into a new art form. This advanced AI image generator lets you turn text prompts into detailed images thanks to its innovative Multimodal Diffusion Transformer. The results can be impressive, with images reaching resolutions of 2048x2048 pixels.
It's all about crafting the right prompts. Think of them as instructions for the AI. You need to be specific, guiding the model towards the image you have in mind. Then you choose a model that suits your system's capabilities, especially considering the demanding nature of the SD3 Medium model with its 2 billion parameters. It's a balancing act between image quality and your hardware's limits.
Once you've got your prompts and model in place, you follow a workflow: generate images, tweak them with prompts, fix imperfections using inpainting tools, and make final adjustments with your favorite photo editor. It's a bit of an iterative process, but that's part of the magic. You learn to fine-tune your approach, leading to better and more interesting results.
This is where Stable Diffusion 3 shines. It's a powerful tool for anyone, from artists to enthusiasts, who want to explore their creative side. You don't need to be an expert, just a curious mind and a desire to experiment.
Choosing the right Stable Diffusion 3 model is a crucial part of the process, even though it might seem like a simple download-and-go step. You have to think about the model's size, which directly affects how your system handles it. The SD3 Medium model, with its massive 2 billion parameters, generates stunning images but also demands a lot of memory.
Your laptop's VRAM and RAM will be put to the test, especially if you want those high-quality images. It's a bit like a game of Tetris, trying to fit all the pieces together. You need to carefully manage your memory allocation because those images take up a lot of space, and even small changes to model parameters can have a big impact on both image quality and speed.
Make sure your GPU is compatible. Not all GPUs can handle all models, and picking the wrong combination could result in slowdowns or even crashes. It's like trying to fit a square peg in a round hole, it won't work as well as a compatible set.
Interestingly, some models can selectively load just parts of their structure to speed things up. This gets really technical, though, and requires understanding how the models are put together.
Before settling on one model, try a few to see how they behave. Sometimes you find unexpected things when you compare them.
Pre-trained models are a great way to start, but they come with the trade-off of less customization. It's a balancing act between quick results and being able to adjust things to your liking.
It's important to track which models you're using because they are constantly evolving. Even small updates can change how they work, making it tough to recreate past results.
Fine-tuning a small part of a model sometimes works better than re-training it from scratch. It's a bit like tweaking a single setting instead of rebuilding the whole machine.
There are many ways to measure how well a model performs. Don't rely on overall "quality" ratings alone. A model might be amazing for one task but terrible for another. It's about figuring out what makes each model unique and how to use them to your advantage.
More Posts from whatsinmy.video: